5 minutes
My experience learning Kubernetes
Introduction
Kubernetes is an open-source tool predominantly used by big tech companies to scale and manage their applications.
While I am not a big tech company (yet), I thought it best that I learn how to use it should the case arise that I may need it.
The Plan
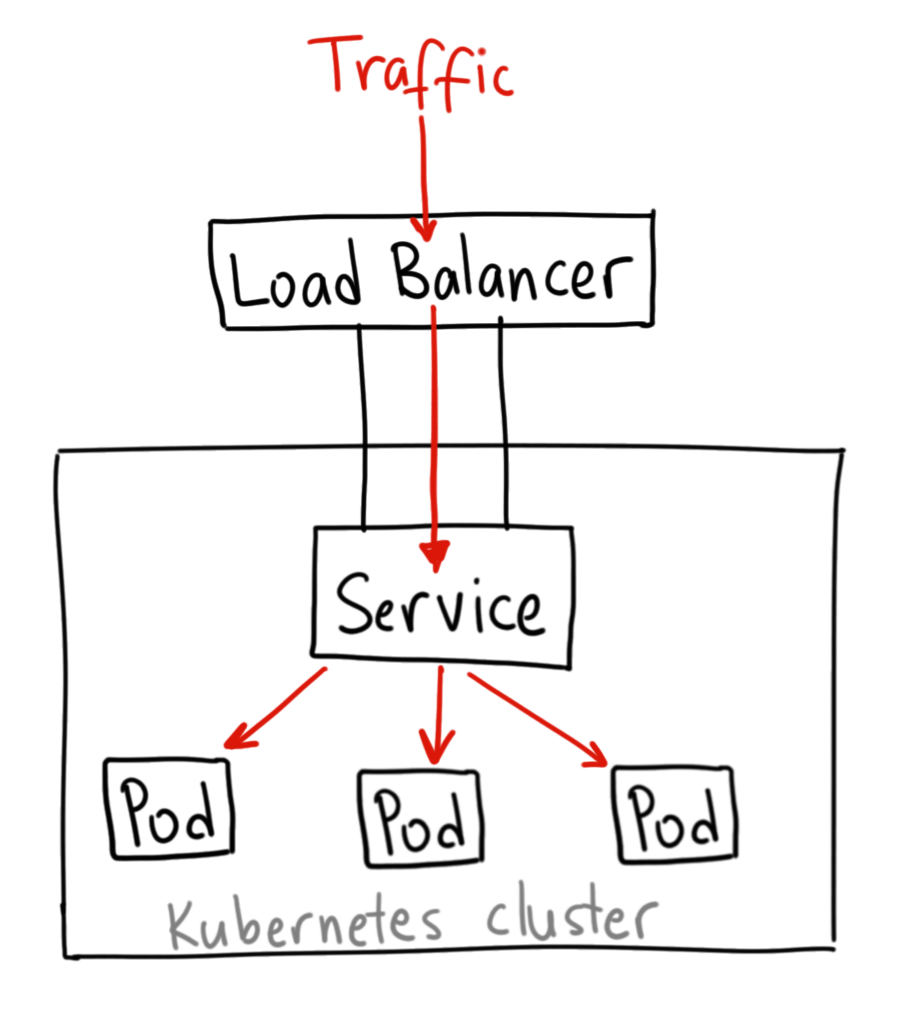
The general idea was to have some sort of simple service sat behind Kubernetes that demonstrates that the service is truly scaled and the load is balanced between nodes.
The Cluster
What is a Cluster?
A cluster put simply, is ‘A grouping of nodes that run containerized apps in an efficient, automated, distributed, and scalable manner’; it’s what Kubernetes uses as a ‘pool’ of nodes to scale your application from.
Creating the Cluster
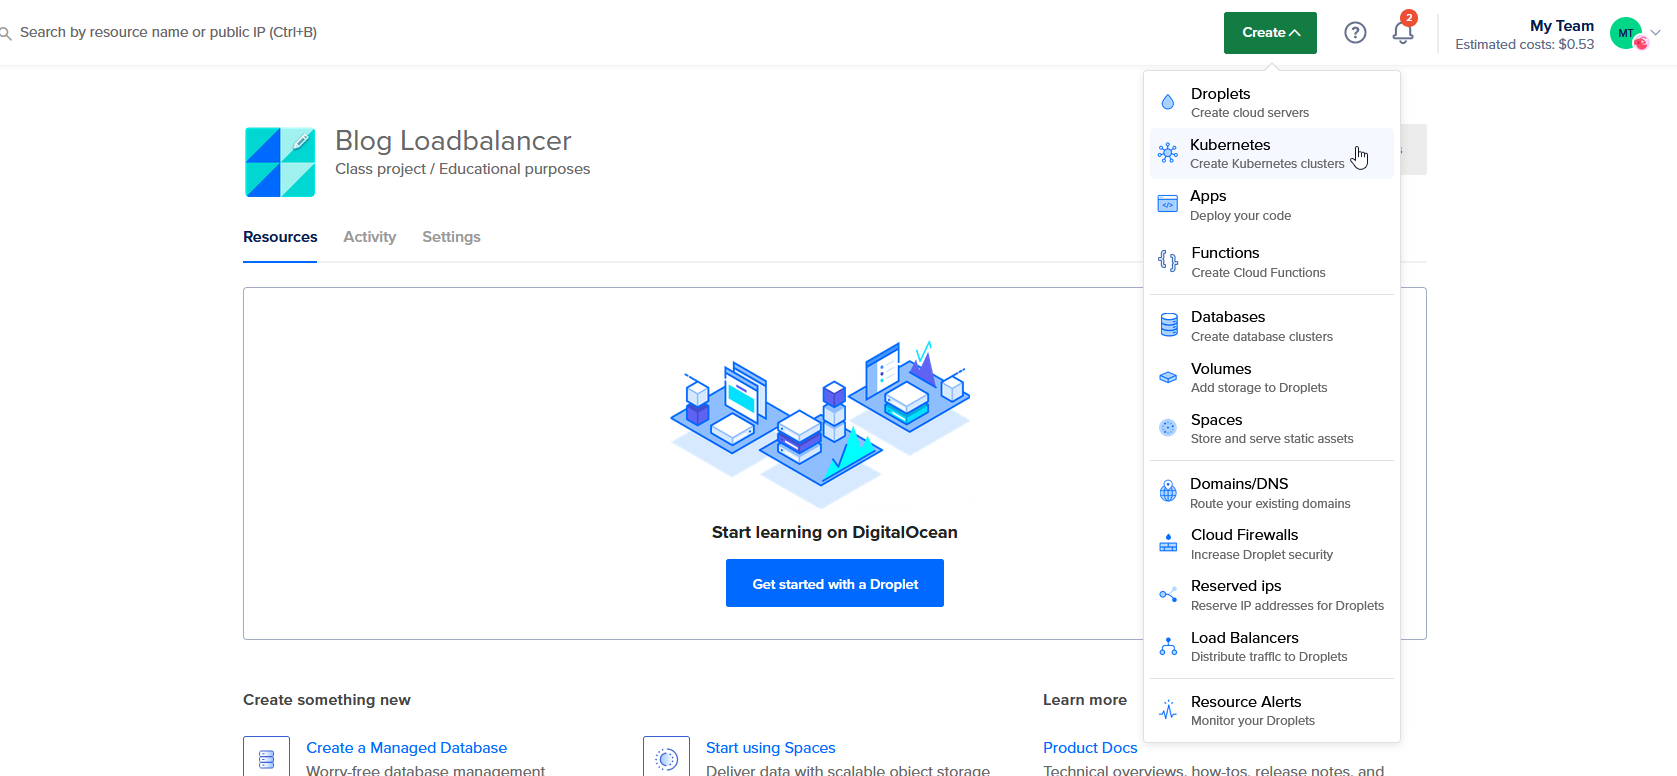
I decided to use DigitalOcean, mainly because I have a student account with them + some credits from a previous project. They make it really easy to spin up resources with them:
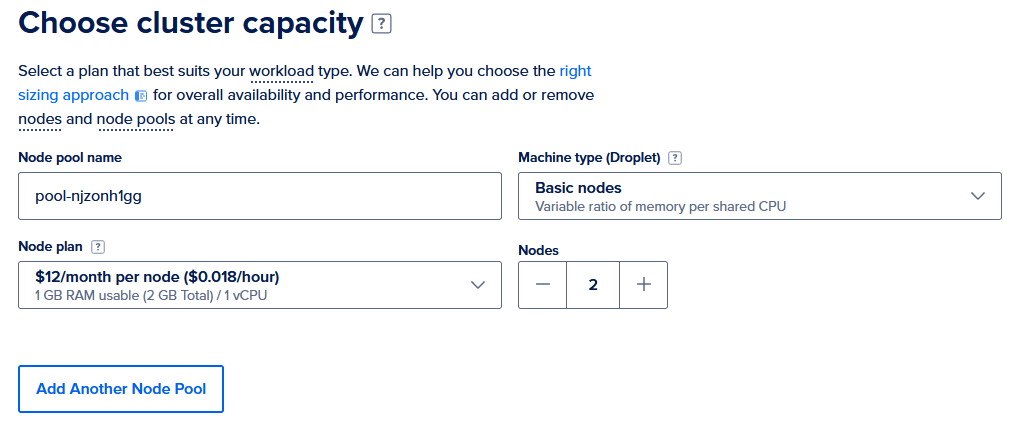
I left all the settings as default, except for the cluster capacity, which I set to 2 (the minimum value). This is because cluster nodes are expensive and for a proof-of-concept, 2 is enough:
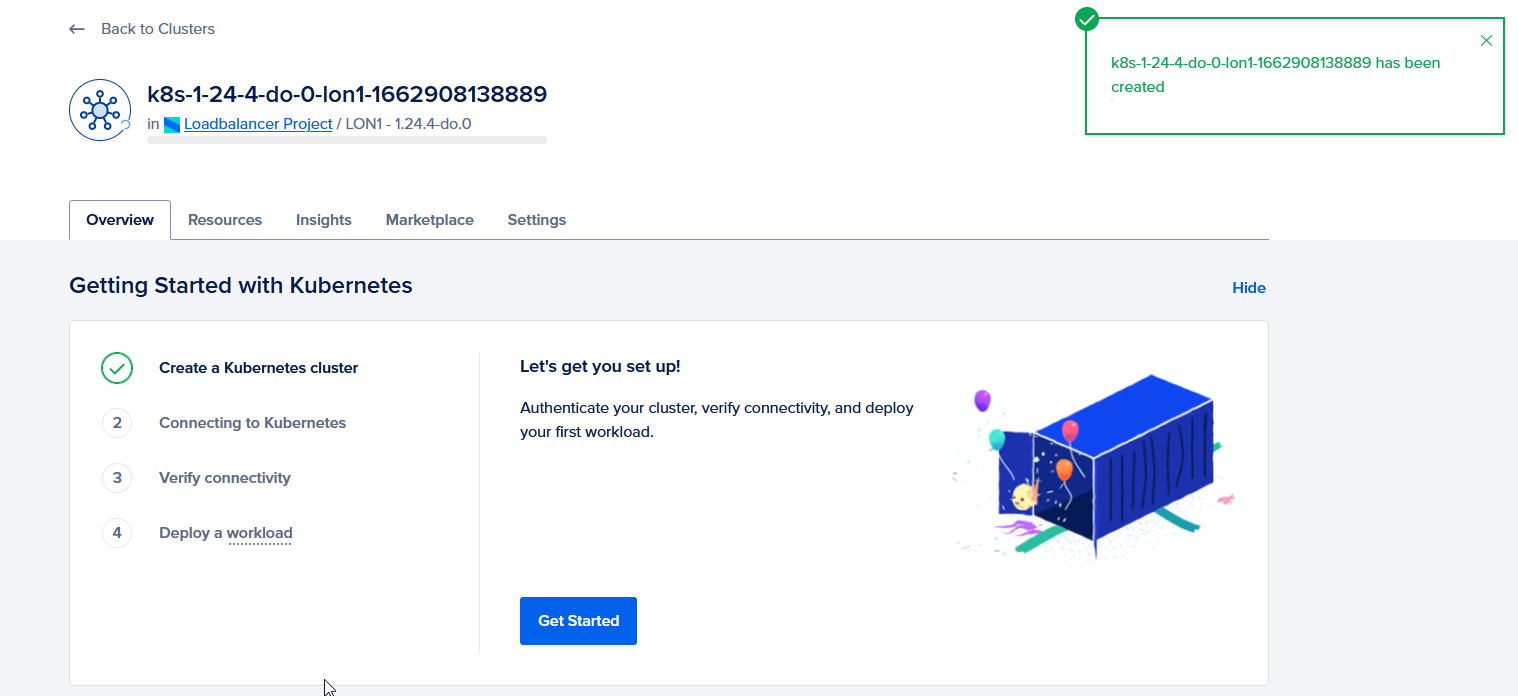
They provide a nice step-by-step tutorial on how to connect and deploy to the cluster:
Following this tutorial, the next step was to install doctl so I could automatically renew the cluster’s certificate. I used this guide to download and authenticate with my DigitalOcean account (so I can access my resources).
Then, I ran this command:
doctl kubernetes cluster kubeconfig save 95b71baf-0b5e-450d-b984-5f512c45d49a
… which adds the cluster of id ‘95b71baf-0b5e-450d-b984-5f512c45d49a’ to my context list inside ‘C:\Users\icond\.kube\config’ configuration file. This allows me to run commands from my local machine which affects the cluster.
I can check that the context has successfully been added by running kubectl config get-contexts:

Now that the cluster is created, we should have a public IPv4 address for the cluser, however the dashboard doesn’t show one.
Deploying our code
NOTE: You can find the code used in this project here.
The code used for my example was ASP.NET Core’s default Web API template, with another simple route ‘localhost/gethostname’. This route simply returns the name of the host, which is very helpful to visualise the load balancing working properly, as it should show different hostnames for different requests:

If you run this on your local machine, you should get this result:

Creating a docker image through GitHub Actions
NOTE: I used this GitHub Action from GitHub to push to the Docker Registry.
The GitHub Action builds and publishes the code from the repository into a docker image file every time you push to the main branch. This CI/CD workflow allows for seamless integration with a production environment without having to do the same steps every time you want to update the codebase.
Creating the deployment
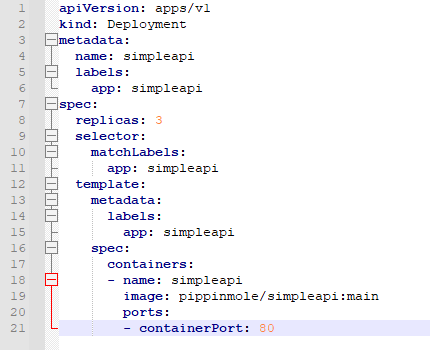
To create a deployment, a config file is required. It specifies data such as what the service type is, where to pull the template from and how many replicas to display:
By saving this file and running:
kubectl apply -f createsimpleapideployment.yml
… a new deployment service is started.
Now, by running kubectl get all we should see all of our services, including 3 pods, specified in the replicas: 3 inside createsimpleapideployment.yml:

We can also see that our C# ASP.NET Core application is running in each pod by running kubectl logs (POD NAME):
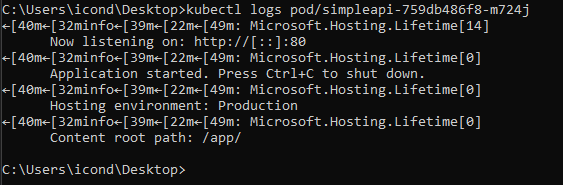
Great! It looks like it’s working so far! Unfortunately, we can’t access these services as they don’t have a public-facing IP yet. This is actually intended as we want our services to route through the load balancer. If the service was public, then it wouldn’t balance the load!
The Loadbalancer
This is a separate resource to the cluster, and its job is to distribute the workload between resources in the cluster, and scale/shrink it when necessary.
Creating the Loadbalancer
The process is pretty much the same as creating the cluster:
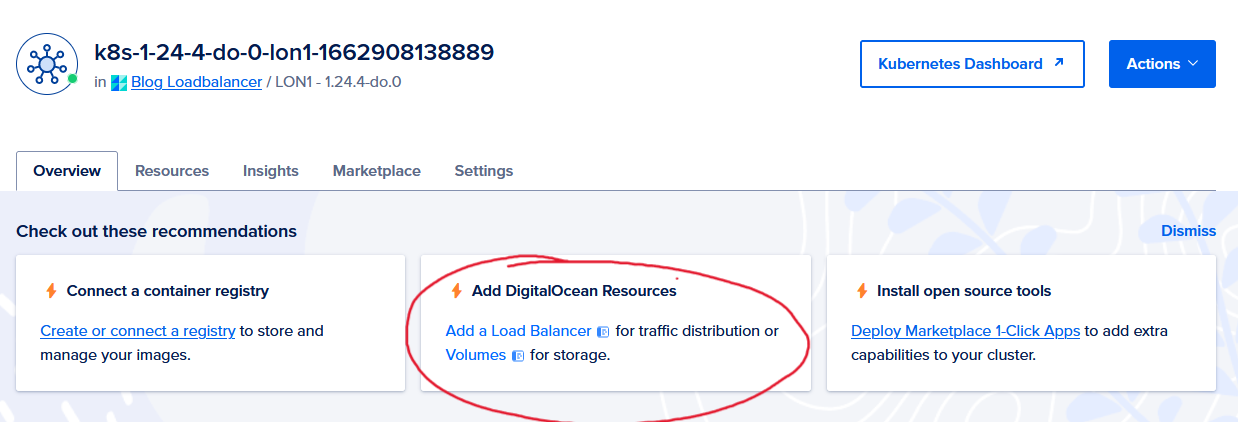
These instructions were actually very unclear - as a beginner to this sort of technology, they assumed a certain level of skill and knowledge and so I got stuck for quite a while on how to apply the configuration file, but a bit of googling and I worked it out.
To add the loadbalancer to the list of resources, a configuration file, otherwise known as a ‘service config file’ is ‘applied’ to the cluster, which ‘binds’ the two together.
So, a file called configpatch.yml (it can be called anything) is created, and this content is added and saved:
apiVersion: v1
kind: Service
metadata:
  name: nginx
  annotations:
    kubernetes.digitalocean.com/load-balancer-id: "your-load-balancer-id"
    service.beta.kubernetes.io/do-loadbalancer-size-unit: "3"
    service.beta.kubernetes.io/do-loadbalancer-disable-lets-encrypt-dns-records: "false"
spec:
  type: LoadBalancer
  selector:
    app: nginx-example
  ports:
    - name: http
      protocol: TCP
      port: 80
      targetPort: 80
Then we apply the configuration by running kubectl apply -f configpatch.yml. This creates a new service of type LoadBalancer:
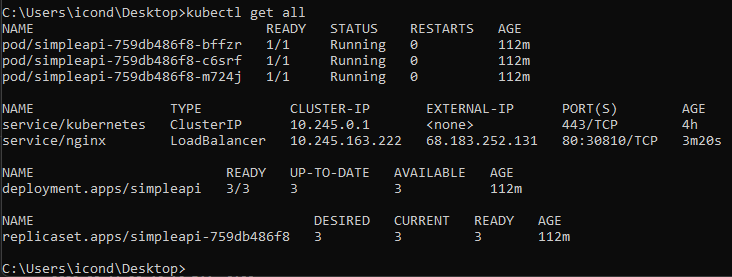
We can see that CLUSTER-IP next to nginx now has a value! Success!
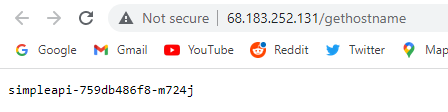
Now, if we navigate to 68.183.252.131/gethostname, we have a response from our application!

And on a different machine, we can see that it uses a different ‘pod’ to handle the request:
Success!
Conclusion
I can see Kubernetes is a very powerful tool, with lots of features that I’m sure are useful to alot of large companies looking to scale their applications. However, as an individual I don’t see it being much use for me.
This blog post doesn’t cover even 1% of the feature-set of K8s and I probably will continue to learn about it some day. It was exciting to see the endpoint actually returning data :)